New England’s Artful Interior


family-builds-logo-still-2

Due to great competition, the DIYNetwork will not be picking up Family Builds.  At this time, we are looking at other Networks for consideration. We want to thank each & every one of you for all your support. We love you all! If you missed the Pilot, you can watch it HERE

wk35instgram

I would like to continue sharing my New England Renovation Projects with you. Check out  Artful Interior Finishing on  Face Book and Instagram for your daily dose of Design Inspiration.  I’ll be sharing tips & tricks, all my favorite paint colors and much more…..

jvrusticchand-2

Take a Peek into my newest development called JVRustic.  My passion for Rustic-Industrial Design is reflected in these Custom Handcrafted Lighting Fixtures that are being displayed in Local Restaurants all over New England. Join us in the JVRustic Workshop to see how we Build them while Renovating this Historic Library into our residence at the same time.


A Show Pilot with HGTV!

blog2016 3

With the help of Talented Producer Michael Winter,  known for his work on Road Rules, House Hunters and Mancaves, my 4 brothers and I pitched a New England Style Family Renovation Show to be considered to join other popular family Reno shows such as Fixer Upper and Property Brothers.

blog2016 4

After a few short interviews that began late last Spring, Michael Winter and his production crew visited us in our hometown of Acushnet, MA  where we gave them a brief history and tour of New Bedford and it’s surrounding communities that have kept our family business growing.

blog2016 1

The show will be about keeping the authenticity and originality of these  historic homes while incorporating modern necessities to fit today’s lifestyle. It’s about the “Craftmanship” and the “Family” behind it. Our huge family with 11 siblings & 19 grandkids is a show in itself!

blog2016 8 (2)

As I join my team of brothers and push their limits to think outside the box, our family bond is put to the test as we work together to face new challenges.

blog2016 6 (2)

Tension flairs after they spend weeks doing all the heavy lifting and I use my artistic flair to try to steal the show.

blog2016 7 (2)

The Sizzle Reel was submitted to the execs at HGTV. They have agreed to move forward to create a pilot.  We still have some big hurdles to jump and a long way to go but we are all very excited for the opportunity of what lies ahead.

blog2016 9 (2)

“Cheers to that” View our Zizzle Reel Here enter password desroches for instant access

Rustic Appeal

Bringing Cool Inspiration to Home Decor.

wk33header

Inspired by some Barnwood accent features my brother Josh installed in his home…

wk33josh3 (2)

I wanted to create some of my own accent walls out of the same material and incorporate them into the homes of my clients.

wk33josh12 (2)

My brother’s creativity really sparked some interest and encouraged me to blend my favorite medium (paint) with this organic beauty.

wk33josh14

Wrapping his beams and lining the inner frames of his skylights really gives his home character and charm. I just couldn’t get enough of this look.

wk 32 barn20 (2)

My brother and I took a trip to this Sawmill in Tiverton, Rhode Island where  I was able to  purchase some wood  for an upcoming project.

wk 32 barn19 (2)

This Eastern Pine once wrapped the exterior of an Old Connecticut Barn.  It will soon have a new home resting on an interior wall overlooking Long Pond in East Freetown, Massachusetts.

wk 32 barn18

I purchased 200 SF for $530 just enough to complete a headboard accent wall.  This wood is not budget friendly, but worth every penny.

wk32barn21

My brothers Seth, Sam & Joel from DesRoches Bros. Inc. installed the Barnwood.

wk 32 barn12 (2)

They began by removing a piece of the baseboard working from the floor up, stacking the planks one by one.

wk32 barn 13 (2)

I had them place my favorite planks towards the top where they would be most visible.

wk 32 barn 14 (2)

The planks were installed using finished nails and a wood adhesive.

wk 32barn15

You can already see this room transforming…

wk32 barn 8 (2)

These rustic planks adds instant warmth and texture to the space.

wk32barn37

Now it was time for me to select some colors and work my magic.

wk32barn30

Starting with the ceiling, I  selected a sky blue which picks up the bluish-gray tones in the wood.

wk32barn33

Utilizing that 5th wall helped open up the space bringing another element of the outdoors in.

wk32barn35

This room has lots of natural light which filters throughout  so I knew it could handle a deeper color on the ceiling.

wk32barn38

I opted for a Creamy White for the walls called Vanilla Milkshake by Benjamin Moore. This allows the Reclaimed Wood to take Center Stage.

wk33 lisa

There was enough barnwood leftover to create a personalize accent to help balance the space.  I had the letter fabricated by my friend Adam Katz of In-House Custom.  I used a piece of cardboard as a template to ensure the letter was the font and dimension I needed.

wk33 rustic collection (2)

The vibrant pop of teal electrifies the space without being to overwhelming

wk33 rustic collection0 (2)

I was so pleased with the finished product. What do you think?

wk 32 Barn fb (2)

Hope this post inspires you to tap into your own Inner Creativity. Thanks for stopping by the Artful Interior.

Click Here to watch our Blank Canvas episode on this project.

Be sure to subscribe to our webseries so you won’t miss our next “Blank Canvas” episode which features this project. http://dld.bz/d59ET

Garage Door Makeover!

Garage Door Makeover!

garage13 (2)

With the warm weather finally approaching for us New Englanders, it’s time to tackle some exterior projects.

garage1 (2)

What better way to spend a weekend than livening up the garage door and adding a little curb appeal!

garage15 (2)

Using the best products to get the job done, I’m going to show you how in a few simple steps.

Supplies Needed:

Oil-Primer

Exterior Water-based Paint in a Semi Gloss.

inexpensive china bristle 2 – 3 inch paintbrush flat or angled sash for priming

good quality 2 – 3 inch nylon paintbrush flat or angled sash for top coat.

small roller frame & good quality roller cover

paint trays & liners

180-220 grit sandpaper

container to pour paint in for cutting in around the edges where the roller can’t reach.

drop cloths

rags

paint opener


Let’s Get Started!

garage5 (2)


Lightly sand the surface using a 180-220 grit sandpaper. This gives the  paint something to adhere to.

garage2 (2)

Make sure your surface is free of oil, grease & dirt.

garage7 (3)

I had my local paint store tint the oil based primer  to the color we selected.  This helps for coverage since our color has a lot of deep pigment in it.

garage11 (2)

Using your china bristle brush, start by outlining or “cutting-in” any areas that can’t be reached with the roller.

garage13 (2)

Using your roller, start at one end and roll the paint in small manageable sections going in the direction of the grain.  Before the paint begins to dry, use your brush to level out the paint from the roller marks so you have a nice even finish.

garage17 (2)

Once your primer coat is dry, you can begin the same process using the topcoat and switching to a nylon brush.

garage20 (2)

Using a new roller cover, repeat the same process and apply a second coat if needed.

garage23 (2)

With the right products and tools, you can tackle this project on your own too.

garage14 (2)

Thanks for stopping by The Artful Interior

Happy Painting!

ask This Old House

ask TOH1

Back in February I attended a Boston Casting Call for a Home Improvement Show coming to New England.

ask This OH

Leaving the audition with little to no feedback other than “Thanks for coming”,  left little to no hope of ever hearing back.

ask Heath

Two months later and out of the blue,  I get a direct message on twitter from Heath Racela the producer of  ask This Old House.

This Old House? Really?!? It’s only my Dad’s all-time favorite show.

I may have just become my Dad’s favorite child.  I have a sibling rivalry going with my 6 brothers and 4 sisters. Sorry guys, but I think this one takes the cake.

TOH_CREW.no crop.jpg

Heath is interested in learning more about  Artful Interior Finishing  as he searches for new talent to be featured on their show. .

This Friday, This Old House will be coming to visit me on my job site in Rehoboth, MA. I have no idea what to expect but I’m so excited to see where this goes……

This Old House - Season 30

Thanks for stopping by The Artful interior.


DIY Bath Makeover

stixheader3 (2)

Does your bath look something like this?

wk32stix

If a remodel is not in your budget there is an alternative to ripping out those tiles.

wk32stix0 (2)

This waterbourne bonding primer called Stix by INSL-X is made to adhere to challenging surfaces. The best part is you can paint over it with almost any paint.

wk18-stix

You can apply it with a brush or roller. It dries quickly so you need to work fast!  Just make sure if you are rolling the paint on, you use a brush to level it out to give it a nice even finish.

wk32stixfinal (2)

Getting in between those grout lines are important. Here I’m using a 3″ flat nylon brush to apply.

stix23

And those ugly fixtures…. paint right over those too!

stix26

Once it dries you want to topcoat using a paint that has a mildew resistant finish. I recommend this product by Benjamin Moore

stix7 (2)

I’m a big fan of wood but we need to brighten this room up and painting it all white will give it a fresh, new feel. Using an Odorless Oil-based primer is key to sealing the wood before applying a topcoat. Here I’m using Kilz Stain-blocking oil-based primer. If you have any knots in your wood be sure to spot prime them with a shellac primer called B-I-N.

stix14 (2)

Start by applying the Oil-based primer. Once dried, lightly sand using a 220 grit sandpaper.

stix17

You can use the same paint for the trim and walls.

stix20

This is a good time to seal any gaps with a fast- drying caulking and fill any holes.

stix29


This is a quick, easy and inexpensive way to brighten up any dated bath.

wk32stix40


No more ugly dated tiles.

wk32stix2 (2)


Hope this blog encourages you to tackle your own DIY Room Makeover.

Thanks for stopping by The Artful Interior.


The Black Whale

The Black Whale Project

Compass black whale

See our latest wall feature addition.

The Black Whale19

The Black Whale in Downtown New Bedford, MA happens to be the biggest Blank Canvas of my career so far.

The Black Whale before (2)

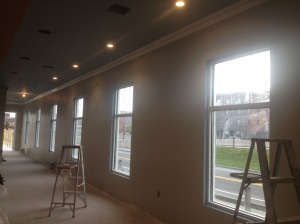
Hard to believe a little over a year ago it was down to these bare bones.

The Black Whale3

Collaborating and building relationships with these other small local businesses on this project was extremely gratifying.

The Black Whale11

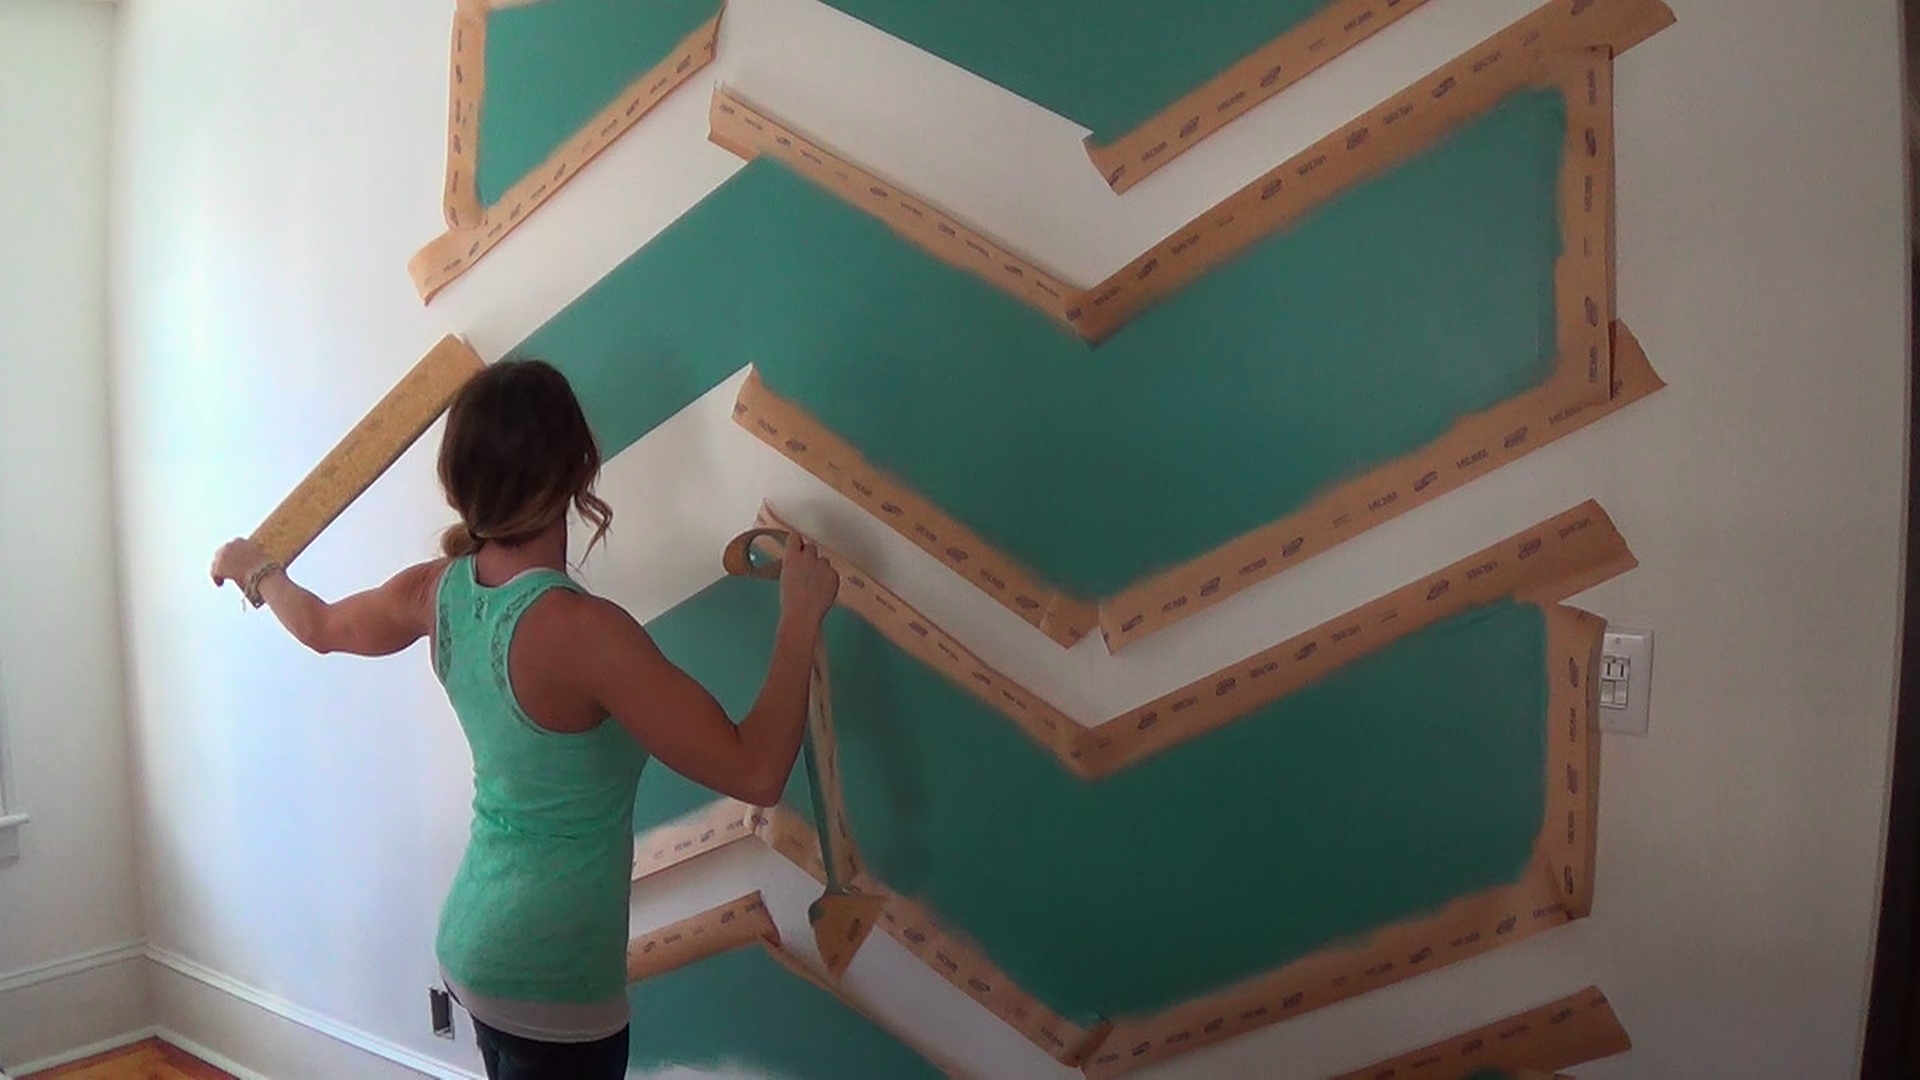
My obligations went further than just designing, I also took on the role of painting  the Restaurant. Most people don’t realize the majority of the work I do is actually basic painting. I stepped completely out of my comfort zone when I was asked to help design it. .

The Black Whale17

I was given a lot of creative license by the Owner, Albert Santos and Manager, Luis DaSilva. We worked together and It was a pleasure working with them both.

The Black Whale web

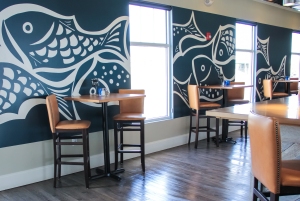
It started with a vision then just evolved over the length of the project. I really wanted to incorporate some of my signature style which is large scale wall murals.

The Black Whale web1

This wall that runs along side the train tracks was the perfect place.

The Black Whale web0

Custom painted wall art in this rich navy creates visual interest, depth and movement. The fish inspired mural took several attempts before getting it just right!

The Black Whale9

Custom Canvas Art produced by a local downtown shop called Spinner Publications worked with me to achieve the large scale wallart. Click here for more Behind-the-Scenes footage of this project.

The Black Whale8

Sorting through hundreds of historical prints, we searched for the perfect 3 photos to modify,  It was important to have this feature wall  reflect the history and diversity of the city with its many languages of the The Black Whale spelled out from Around the World.

The Black Whale5

My love for rustic was introduced  wrapping  this weathered pine in a chevron pattern around the bar. The wood creates texture and warmth, a nice contrast with the blue and gray tones.

wk9bw5 (2)

I hand selected the pine from 2 local sawmills.  Robert Pires of Bob’s Building worked patiently with me, bringing my vision to life.

wk9bw

After much dispute, I decided to colorwash the weathered pine to soften and brighten the look and give it a more nautical feel.

The Black Whale19

I used the floor as my jumping off point, selecting the Lager Vinyl Planks with a rustic quality and selecting my color scheme from colors that were in the flooring. It had pretty blue grays and orange tones that I wanted to bring out.

The Black Whale10

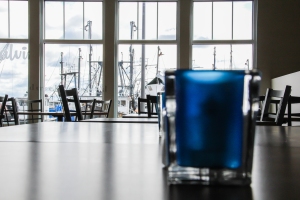
One thing I’m known for is utilizing that 5th wall so these ceilings had to have COLOR! The tinted blue ceilings give the illusion of a larger and more open space and was perfectly suited for this seaside cafe.

the black whale bath0

All the flooring and tiles were supplied and installed by New Bedford Tile and Carpet.  The Bathroom  was a  combination of Island Palms chevron glass in a pop of orange and porcelain plank tiles for 3/4 walls. The cast wave sinks were custom made by Sonoma Cast.

wk8Black

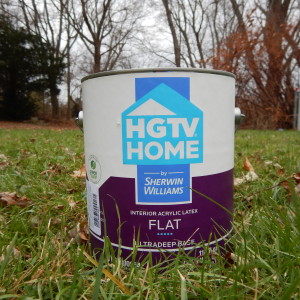
I used Benjamin Moore’s Revere Pewter for the walls and Sherwin Williams Medatative for the tinted blue ceiling. The neutral walls allow for the accent colors to really pop! The crown molding gives some nice architectural detail and helps break up the colors.

The Black Whale20

The Orange accent ceiling over the bar was painted in Benjamin Moore’s Potters Clay casting a warm glow in contrast to the stainless bar racks.

The Black Whale16

My Blank Canvas didn’t stop there. We had to fill this outdoor patio with some color. Lisa and Jackie from Fairhaven’s  Gotta Have It  was such a big help in helping me select the perfect  furniture in just the right pop of colors.

wk32

I went into this project not knowing much about Restaurant Design at all. I’m grateful I was given the opportunity but more importantly, I’m thankful to other seasoned professionals who were so generous and eager to help me along the way.

The Black Whale13

This job has prepared me for the next 3 Restaurants I’m currently working on. If you haven’t made it by The Black Whale, be sure to stop in and let us know what you think.  The food is just as amazing as the atmosphere!  Thanks for stopping by the Artful interior.

Special thanks to Aly Morrissey of www.alymorriseyphotography.com for your beautiful photography.

Spring Fling

Spring Fling with Teal!

wk6header

Spring is FINALLY here so I’m ready to give my Artful Interior a little makeover…

wk6-sf

Testing out some new colors and patterns on my wall of ever changing color.

wk6sf10


The Chevron Pattern never seems to go out of style.

wk6sf8

These doors were the perfect Blank Canvas to add an Ombre Finish

wk6sf4

So I mixed up a little color

wk6-sf0

and watched my space come alive

wk6sf16 (2)

This color adds some punch to my all gray & white interior.

wk6sf3

I didnt stop there…

wk6sf2

My Entry Door got a Makeover too.

wk6sf11


What’s your Spring Decor look like?

Beach House Makeover

Welcome to my BEACH HOUSE MAKEOVER!

DIY Decor with coastal colors

wk30beach (2)

Making BIG IMPACT in a small space!

One

I wanted to visually make the most of this  6 by 8 SF room in a tiny beach house on West Island, so here’s what I did…. 

Two

Blue is a receding color that gives the illusion of open space. ( Notice how I painted right over the crown molding) and you know I’m a huge fan of Utilizing the Fifth Wall. For instructions on “How to Paint a Wall” refer to my video.

Three

I measured out my accent wall from top to bottom

Four

and divided it into 4 sections

Five

A level ensures my lines are straight and helps to mark out my stripes using a white charcoal pencil.

Six

Time To Tape Off

For best results use Scotch Blue. They make an easy release painters tape for delicate surfaces.

Seven

Tape off every other stripe beginning with the second one down from the top. We want to leave the top stripe the same color as the ceiling to make the room appear more open.

Eight

Begin by loading your brush with paint. I mixed my base color with white to lighten it up a few shades.

Nine

You can also use a roller to speed up the process. Here I’m using a 3” flat sash latex brush by Tacoma Corona.

Ten

Apply a second coat if needed and gently remove tape while paint is still wet.

Eleven

“Wah-La”  ….. but this room isn’t finished YET….

stripes14

There’s still lots more to do here….

Twelve

We’re getting creative and re-purposing old furniture

wave39

to fit our beach house theme

wave11

We’ll show you the process step-by-step

wave9

using Annie Sloan’s chalk paint.

wave34

Sign up for our newsletter to get updates on our Beach House Makeover.

Thanks for stopping by The Artful Interior.

For more inspiring ideas with Painted Stripes see my video “Incorporating Photo Art with a Metallic Stripe”

My Marsala Makeover

marsalalove (3)

Everyone in Fashion & Design is talking about this new color since Pantone announced it as it’s 2015 Color of the Year.

With all the mixed reviews and controversy

With all the mixed reviews, I wanted to form my own opinion so I found this perfect Blank Canvas to splash some color on.

by the HGTV line at Sherwin Williams

I went straight to Sherwin Williams and selected this color called “Cordial” by the HGTV line.

marsala0 (2)

As I opened the can I instantly notice its earthy brown undertones.

marsala1 (2)

I’m more of a cool tone kind of gal so I wasn’t sure how I was going to feel about having Marsala in my Artful interior

marsala3 (2)

But this color is just what this space needs to add some instant warmth to this North facing room.

marsala000 (2)

LOVING it already!

marsala11 (2)

Makes a great accent color for Kitchens & Dining Rooms ans works great when paired with lots of neutrals.

marsala12 (2)

It also seems to be working pretty well with my yellow bandana.

marsala31

What a difference a change of color can make! I think I’ll keep it for a little or at least until the next color curiosity gets the best of me.

Would love to hear YOUR thoughts on Marsala. Thanks for stopping by The Artful Interior